Cooking Tool for Tenderizing meat
Article
2025-12-23 • 6 min read

Cooking Tool for Tenderizing meat

Cooking Tool for Tenderizing meat opens a small, practical chapter in the larger story of home cooking. For many home cooks, preparing a cut of meat to cook evenly and quickly can feel like a science project. The right tenderizing tool can transform a tough...

Cooking Tool for Tenderizing meat opens a small, practical chapter in the larger story of home cooking. For many home cooks, preparing a cut of meat to cook evenly and quickly can feel like a science project. The right tenderizing tool can transform a tough chuck or flank into a uniform canvas ready for a pan, grill, or smoker. This article explores the tools, brands, and best practices that empower cooks to tenderize with confidence, including practical buying tips, usage techniques, and maintenance advice.

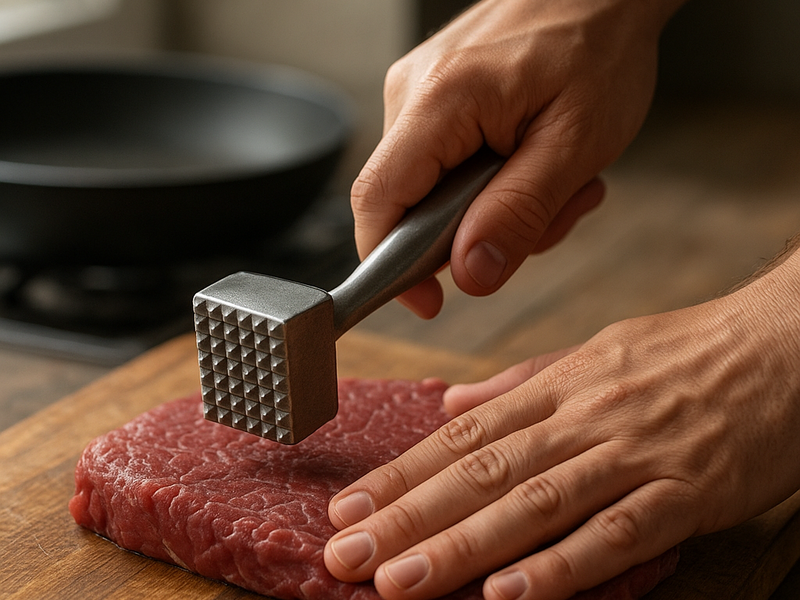
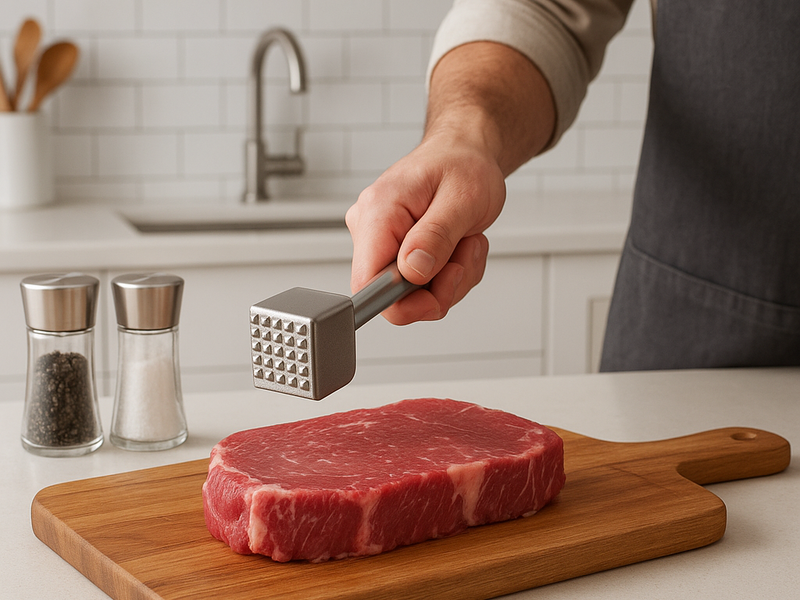
There are two broad families of tenderizing tools you will encounter in most kitchens: mallets and needle tenderizers. Mallets come with a flat or textured hammerhead, sometimes paired with a smooth flat side for pounding and a textured side for slight scoring. The idea is simple: fragment and break down the dense muscle fibers with controlled blows, creating a more permissive surface for marinades and faster, more even cooking. Needle tenderizers, sometimes marketed under the Jaccard name, feature rows of stainless steel pins that pierce meat to improve moisture and marinade penetration. Both tools aim to disrupt fibers, but they do it through different mechanical approaches, and each has its ideal use case.

If you are shopping for a tenderizing tool, you will find a spectrum of options across major retailers. Large online marketplaces offer breadth and competition: Amazon sells a wide range of mallets and needle tenderizers from budget to premium brands, frequently with user reviews that help gauge durability and ease of use. For those seeking curated options and a higher-end experience, specialty kitchen retailers like Williams Sonoma and Sur La Table present branded tools that emphasize ergonomics and materials, often with better warranties or heavier build quality. Among the brands that regularly appear in top picks are OXO for user-friendly, well designed mallets; Norpro for affordable, reliable kitchenware; and Jaccard for its long history of needle tenderizers. If you want to compare direct, brand-specific offerings, visiting the manufacturers’ sites — for example Jaccard’s official site for the classic needle tenderizer, or OXO’s site for their Good Grips mallets — can provide detailed specs and care guidance. In addition, brick-and-mortar retailers like kitchen goods specialists or outdoor cooking retailers sometimes carry durable, pro-grade models that are tested in real grilling and roasting scenarios.

When choosing between mallet and needle tenderizers, consider the meat you most often cook and your preferred workflow. A flat mallet is versatile and forgiving; it works well on steaks, pork chops, chicken cutlets, and tenderizing tougher cuts before braising or quick searing. A well-made mallet should have a comfortable handle, a reversible head with a pounding side and a smooth side, and a head that resists bending or cracking under repeated strikes. A needle tenderizer, meanwhile, is particularly useful for enabling faster marinade penetration and quicker cooking of leaner, tougher cuts. The needles create micro-channels that allow moisture and seasonings to reach deeper parts of the meat, which can translate into juicier results when time is limited. If you frequently work with very lean cuts or you want to punch up flavor absorption quickly, a needle tenderizer can be a worthy addition. For most home cooks, a single high-quality mallet is a good first tool; a needle tenderizer can be added later if you regularly prepare tougher cuts or rely on quick marinades.

Cooking Tool for Tenderizing meat

If you want a simple how-to on tenderizing, here is a practical workflow you can adapt. Start with the right cut and the right tool. If you plan to sear or grill, select a cut that benefits from even thickness. Chill or lightly freeze the meat for a short period to firm it up, which makes pounding more predictable and safer. Prepare your working surface with a sturdy cutting board and a sheet of parchment or plastic wrap to protect the meat and your tool. For a mallet, place the meat between wraps and use the flat, steady side of the hammer to deliver short, controlled taps, gradually working from the center outward to avoid tearing the edges. The goal is to flatten the piece to an even thickness without shredding the surface. For a needle tenderizer, position the tool over the meat and press straight down, then lift and reposition to cover the entire surface. Do not drag the needles across the meat; instead, use a grid-like pattern to maximize penetration while preserving the overall shape of the piece. After tenderizing, allow the meat to rest briefly and then proceed with your chosen cooking method. If you are using a marinade, consider enzymatic options like pineapple or papaya with caution, as overexposure can lead to mushy texture. Marinade times vary with cut size and density; aim for a few hours for thicker steaks or roasts, and shorter times for thinner cuts.

Care and maintenance are essential for performance and safety. Clean tenderizing tools promptly after use. For mallets, wash with warm, soapy water and dry thoroughly; if the design is dishwasher safe, you can use a gentle cycle, but check the manufacturer’s guidance. Needle tenderizers require more attention: rinse and scrub between the needles to prevent trapped meat particles, and dry the tool completely to avoid corrosion. Some models feature protective caps or covers for the needles; using these helps prevent accidental pokes during storage and protects the tool when not in use. Inspect the tool regularly for bent or dull needles on needle tenderizers or any cracks in the head on mallets, and replace parts or the entire tool as needed to maintain performance and safety.

Beyond the mechanics of tenderizing, there are strategic tips to maximize tenderness and flavor. Mechanical tenderizing works best when you balance fiber disruption with controlled cooking. Do not over-tenderize, as excessive hammering or needle punctures can cause uneven cooking or a dry texture if the meat dries out during cooking. Pair tenderizing with proper seasoning and, when appropriate, a mindful marinade that complements the cut without overpowering it. For thicker meats, sear first to create a crust, then finish in the oven to a safe internal temperature; this approach benefits from the even surface a tenderized piece offers. Also consider dry brining or a light salt application a few hours before cooking; the salt helps retain moisture and improves texture in conjunction with mechanical tenderizing. Finally, plan for post-tenderizing resting time. Let the meat rest after cooking; this helps retain juiciness and makes the final texture more consistent.

In practical terms, a well-chosen tenderizing tool can streamline weeknight cooking and elevate weekend meals. The right mallet or needle tenderizer, chosen from respected brands and supported by straightforward care routines, becomes a long-lasting partner in the kitchen. And while tenderizing is a simple technique, its impact on texture, juiciness, and flavor can be substantial when combined with thoughtful seasoning and cooking. Whether you lean toward a sturdy mallet with a comfortable grip or a precise needle tenderizer that helps marinade soak through lean cuts, the investment pays off in a more forgiving cook time, a more uniform finish, and a more satisfying meal for family and guests alike.

← Back to all articles