How to Make a Paper Airplane
Article
2025-12-08 • 6 min read

How to Make a Paper Airplane

Making a paper airplane is one of the simplest, most enduring craft activities there is, and it doubles as a tiny lesson in physics. The beauty of a basic paper airplane lies in how cheaply and quickly it can be created, tested, and improved.

Making a paper airplane is one of the simplest, most enduring craft activities there is, and it doubles as a tiny lesson in physics. The beauty of a basic paper airplane lies in how cheaply and quickly it can be created, tested, and improved. It is a pastime that crosses age and skill boundaries, offering endless room for experimentation while keeping the process approachable and fun. Below is a practical, well rounded guide that covers the basics, a few design variations, and where to find more materials and inspiration.

First, a quick look at why some planes fly farther than others. The key ingredients are balance, aerodynamics, and a clean fold. Stability comes from the distribution of weight along the fuselage, and the shape of the wings determines lift and drag. Small adjustments to the nose weight, wing angle, or trailing edges can dramatically change how a plane behaves when you throw it. The great thing about paper airplanes is that these adjustments can be tested in real time with no risk or cost beyond a sheet of paper.

Starting with the classic dart design, which is a reliable everyday option:

- Start with a square sheet of paper, ideally a standard printer paper for consistency. - Fold the paper in half lengthwise and create a sharp central crease. Unfold to reveal the crease line. - Fold the top two corners toward the center so they meet at the crease, forming a triangle at the top. - Fold the point of the triangle down so its tip aligns with the bottom edge of the paper, creating a small rectangle at the bottom. - Lift the newly formed top corners and fold them toward the center again, setting up the wings. - Fold the wings down on either side so their trailing edges align with the bottom edge of the body. A small crease along each wing helps define the shape. - Optional tweaks include giving the wings a slight upward bend (dihedral) and adding tiny “winglets” by folding a small edge upward at the tips. These changes can improve stability and distance.

If you want a plane that glides more slowly and smoothly rather than diving quickly, try a slightly different approach, often called a glider or cruiser:

- Begin with a similar square sheet and a strong center crease. - Instead of pinching the corners inward, give the wings a longer, broader sweep by extending the folds along the body so the wings cover more surface area. - Keep the nose heavier, but distribute the weight with a small, deliberate fold toward the front or a folded paper clip inside can help - though the latter may not suit all classrooms or settings. - The goal is more lift, less abrupt nose-down motion, and a longer, more graceful flight arc.

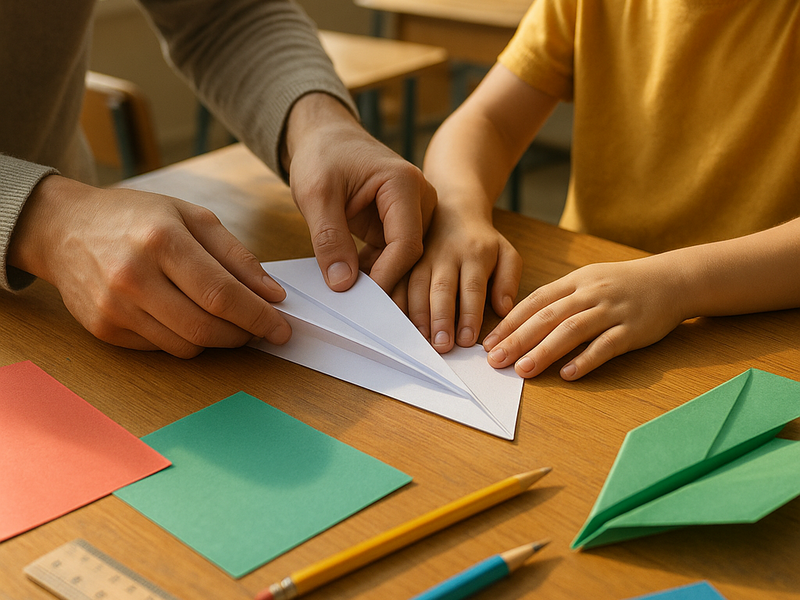
When testing your plane, consider launch technique as part of the design. A quick, level throw with a slight upward angle tends to produce longer flights for darts, while smoother, more gentle throws suit gliders. If your plane loops or dives immediately, inspect for a few common culprits: a nose that’s overly heavy, wings that are unequal in size or angle, or folds that aren’t perfectly crisp. A clean crease makes a big difference, so take a moment to sharpen each fold with a ruler or the edge of a finger.

What to fold with and where to learn more

How to Make a Paper Airplane

Materials and tools make a difference, though you don’t need much. A standard sheet of printer paper or notebook paper works reliably. Heavier or lighter paper can alter performance; for beginners, keep to something between standard office weight and a light cardstock if you want a sturdier plane to withstand rough tests. If you want a touch of flair, colored or patterned paper can help you track performance across multiple trials.

Where to buy materials and guides

- Book and media retailers: If you’re seeking a structured, reference style resource, large retailers like Amazon and Barnes & Noble offer numerous books on paper airplanes, folding techniques, and even aerodynamics concepts that are accessible to younger readers. Independent bookstores via Bookshop.org also offer similarly styled titles while supporting local shops. - Craft and office supply stores: Retailers such as Michaels, Joann, Hobby Lobby, and Walmart stock basic origami paper, assorted colored sheets, and instructional guides. They’re excellent for impulse buys on a rainy afternoon or for stocking up with a classroom or workshop in mind. - Online marketplaces: Etsy and similar platforms host a range of origami paper sets, specialty sheets, and even ready-made paper aircraft designs created by independent makers. These are great for unique textures, colors, or designer packs that spark creativity. - Tutorials and learning sites: For free instruction, sites like Instructables and WikiHow offer step by step guides with photos or diagrams. YouTube hosts countless video tutorials, from quick two minute methods to longer explorations of different airplane designs. These resources are useful for visual learners who want to see folds performed in real time and to observe how small changes affect flight.

Books and kits versus free learning

If you want a curated learning experience or a giftable item, books and guided kits from reputable retailers can be a smart choice. Books often present a progression from simple to more complex designs, plus science-backed explanations about why certain folds work. Kits may include pre cut sheets, stencils, or folds that demonstrate specific principles of flight. For schools or clubs, purchasing a handful of inventive kits can deliver a faster, more engaging group activity than scrounging for loose sheets.

On the other hand, free online resources are ideal for exploratory learning or casual play. They empower you to test dozens of designs in a single session, compare outcomes, and share results with friends or students. The most successful learners often blend both approaches: start with a solid, reliable design from a trusted source, then customize and remix using online tutorials to tailor performance to your environment.

A few practical tips

- Start simple, then iterate. Use the same paper, record a couple of tests, and adjust one variable at a time. - Keep folds crisp. Use a straight edge or a ruler to press each crease flat for clean wing edges and stable flight. - Balance is king. If your plane veers left or right, try a tiny adjustment on the corresponding wing or shift a bit more weight toward the opposite side. - Learn from others. Compare your results with online tutorials or peers. Not every plane flies the same in every setting, so use what works locally.

Whether you are preparing a classroom activity, a family weekend challenge, or a quiet hobby, the art of making a paper airplane remains an accessible, surprisingly rich way to explore design, physics, and creativity. The next flight may come from the simplest sheet of paper, yet the experiments and discoveries behind that flight can be genuinely expansive.

← Back to all articles